 Tutorials
Crop Video is used to cut out the borders of your video to a selected ratio.
-
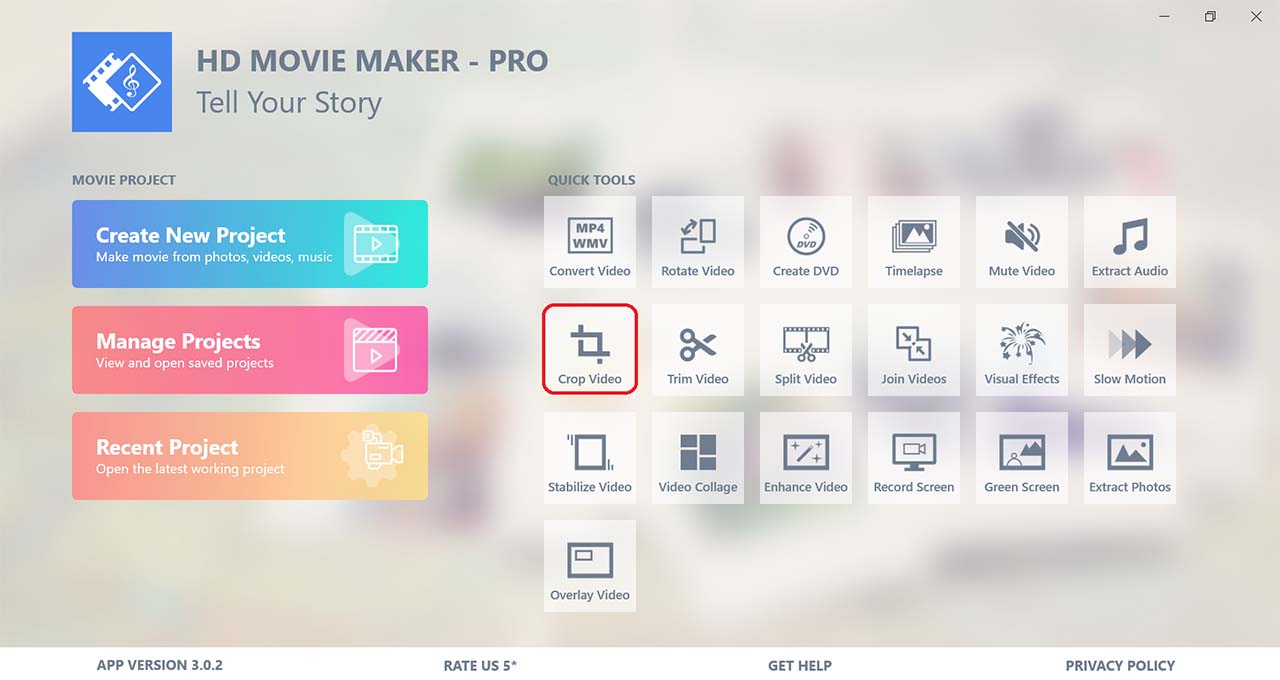
To open the tool, select Crop Video in the Quick Tools section
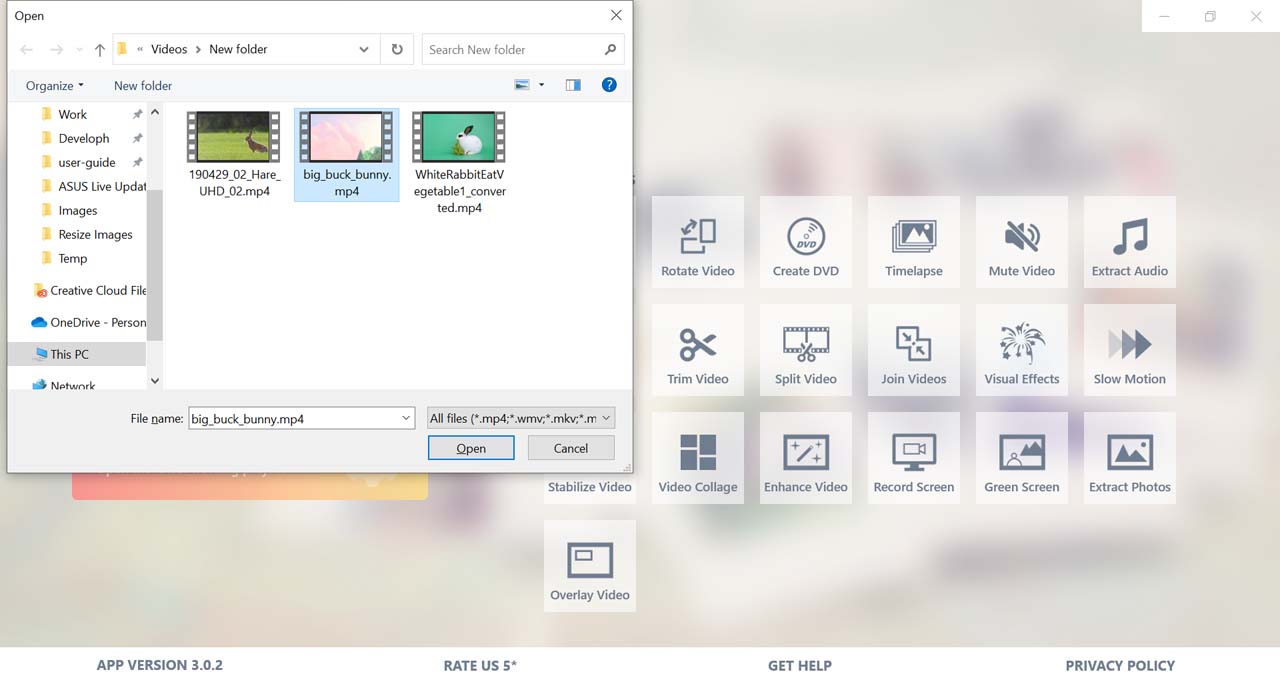
A dialogue box will be shown to choose the input video.
-
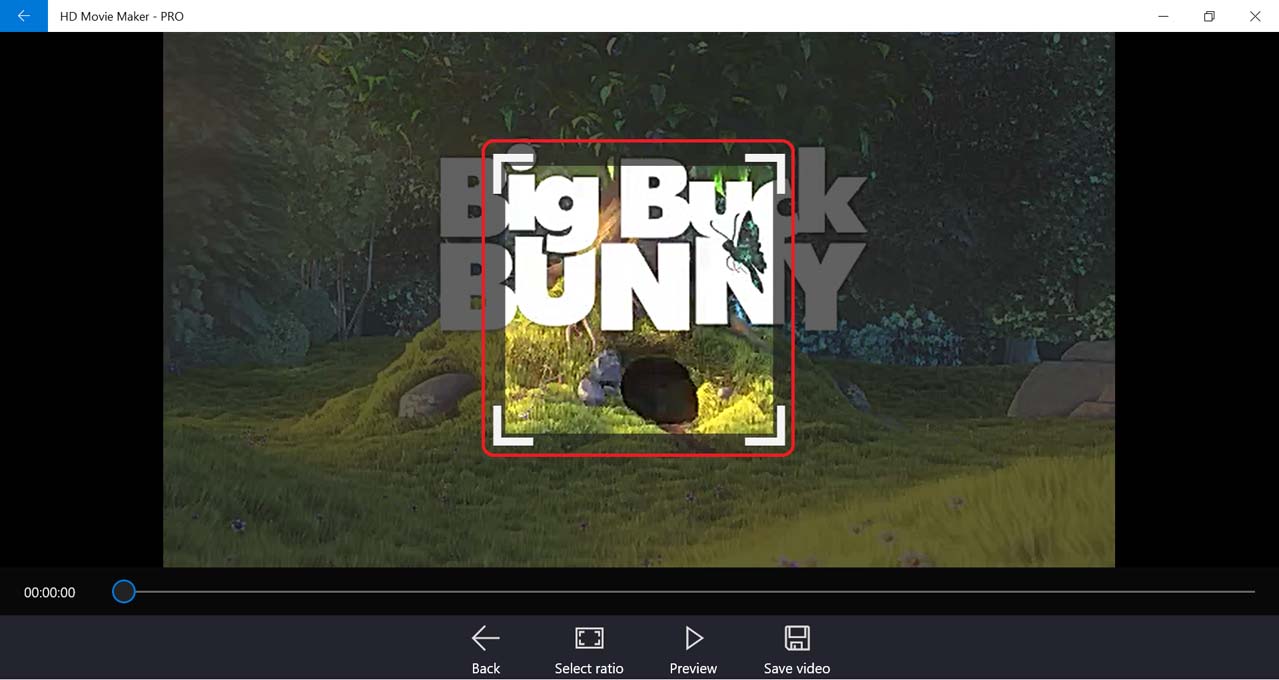
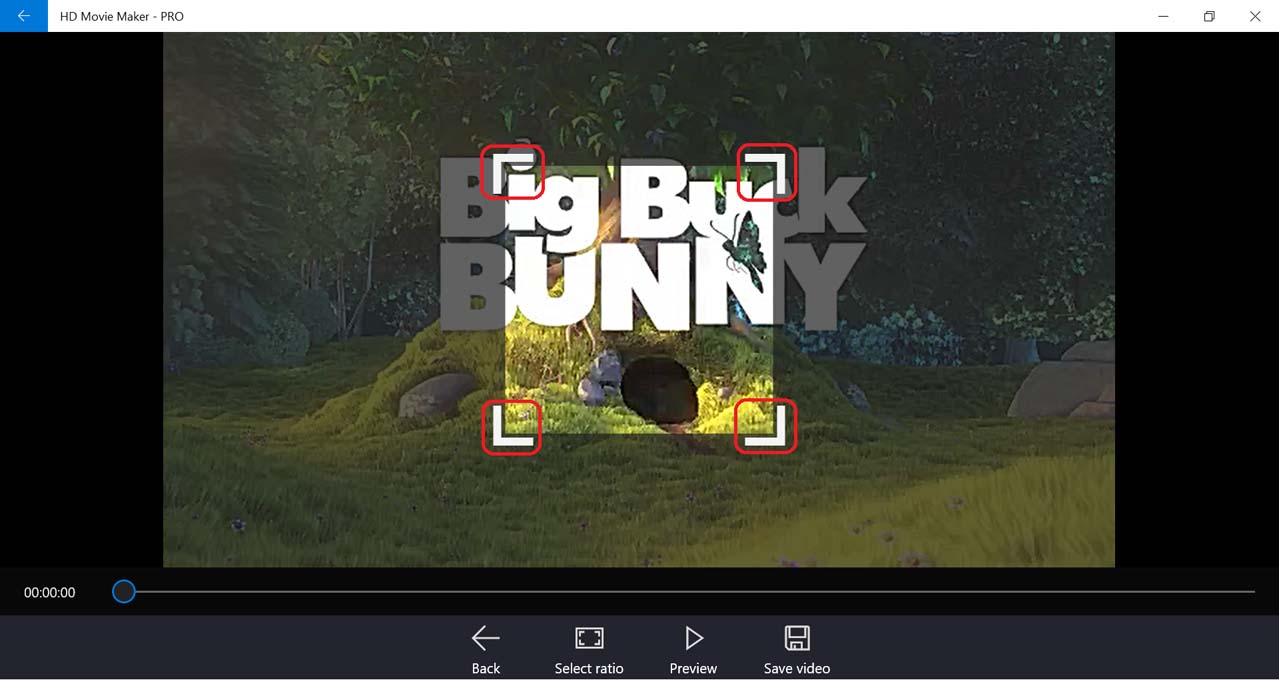
A crop frame will appear on the preview area. You can use this frame to change how the final output video look by repositioning the frame, changing the ratio of the frame, and changing the size of the frame.
-
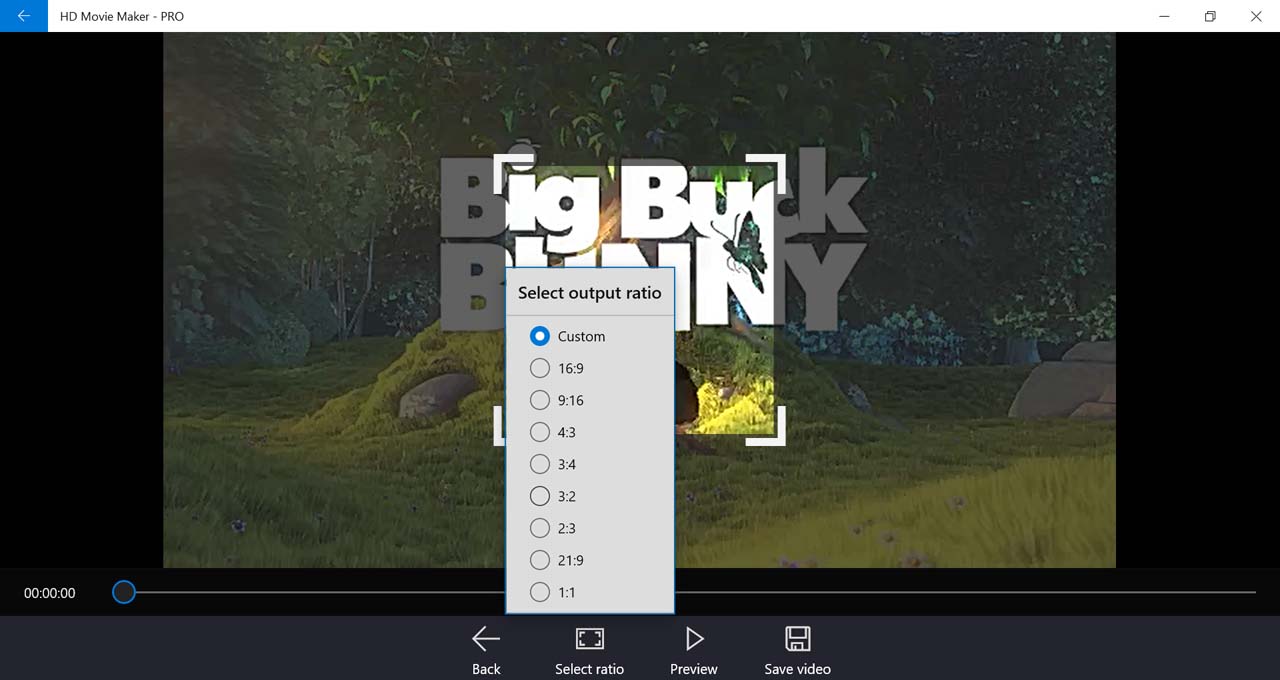
The ratio of the frame can be changed by clicking Select ratio.
-
Drag any corner to adjust the size of the crop frame.
-
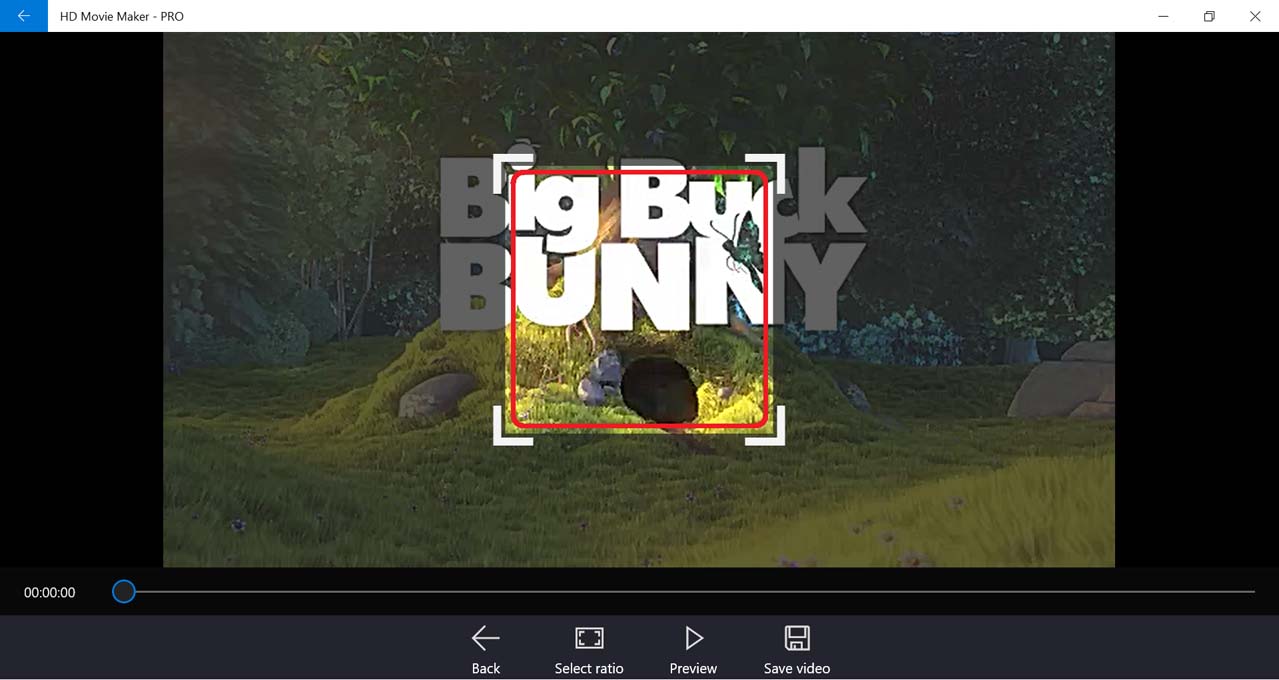
Drag the inside of the crop frame to position the part of the video that you want to keep.
-
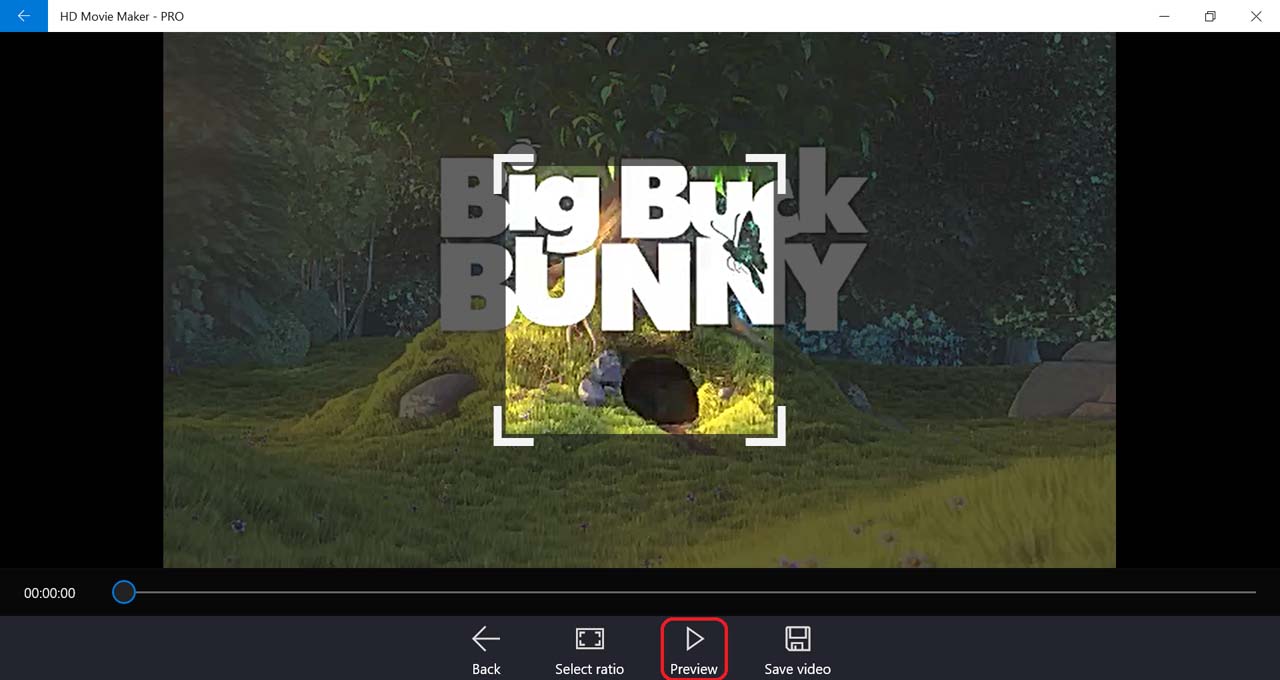
Select the Preview button to see the adjustments you made.
-
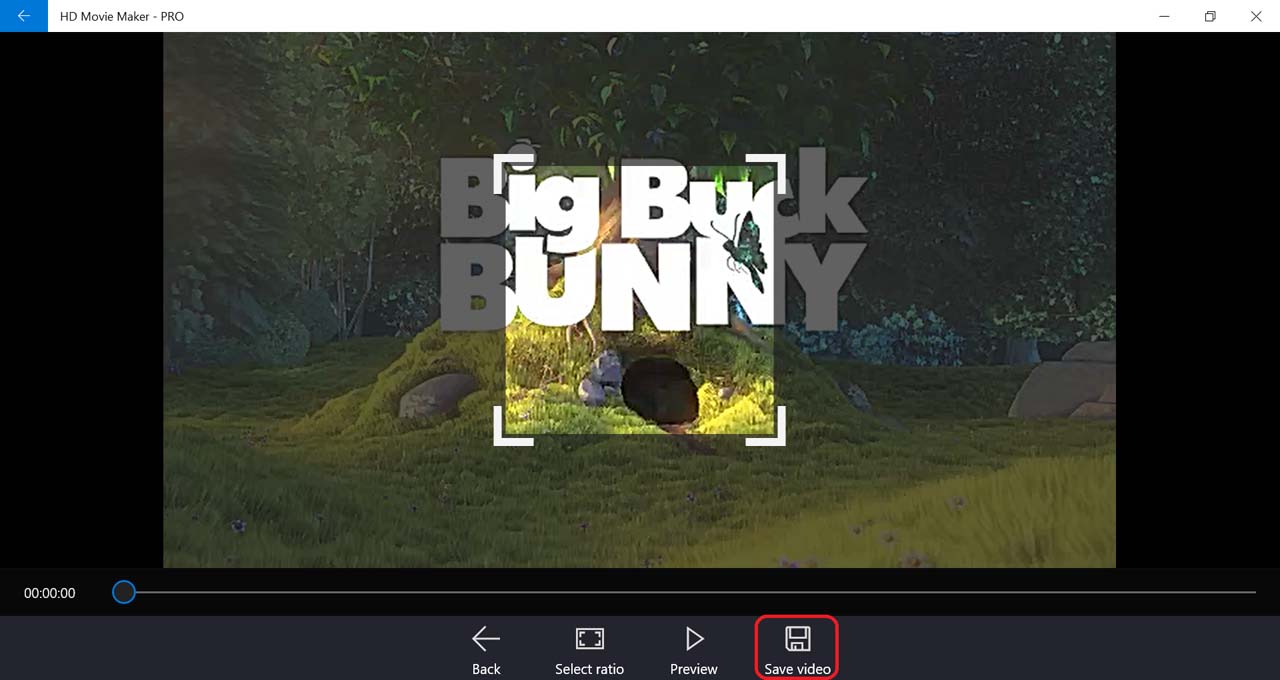
When you’re happy with your changes, select Save video.
-
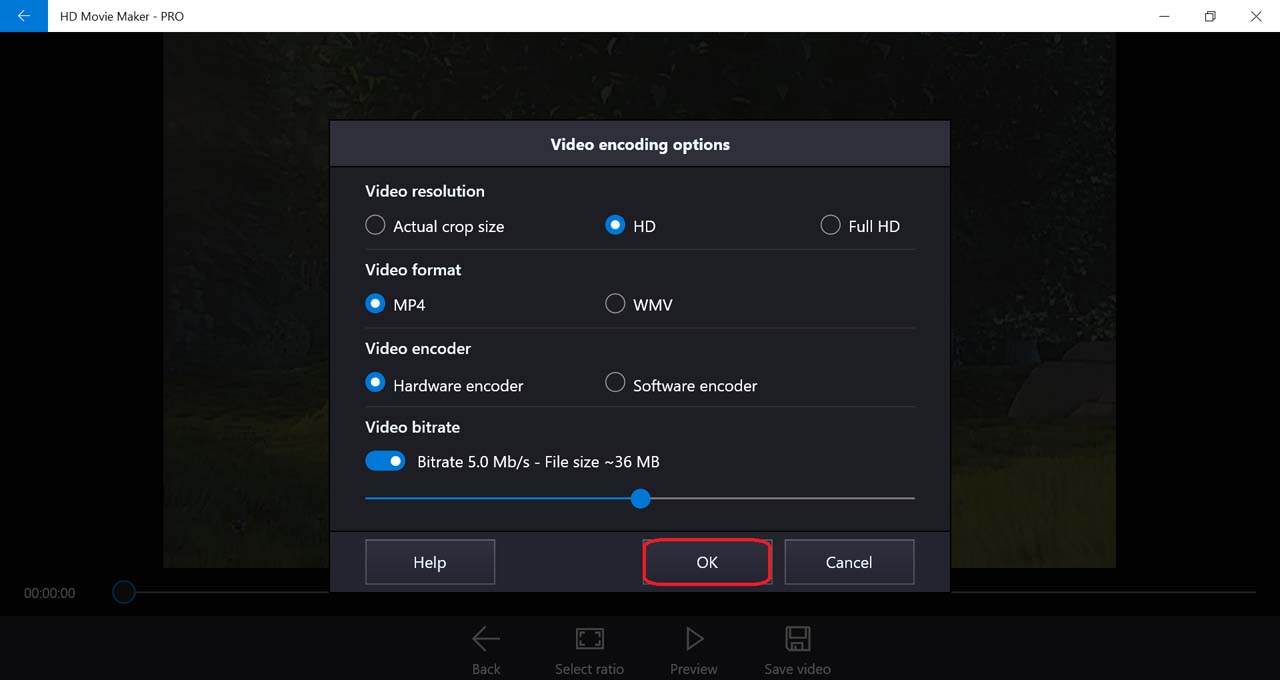
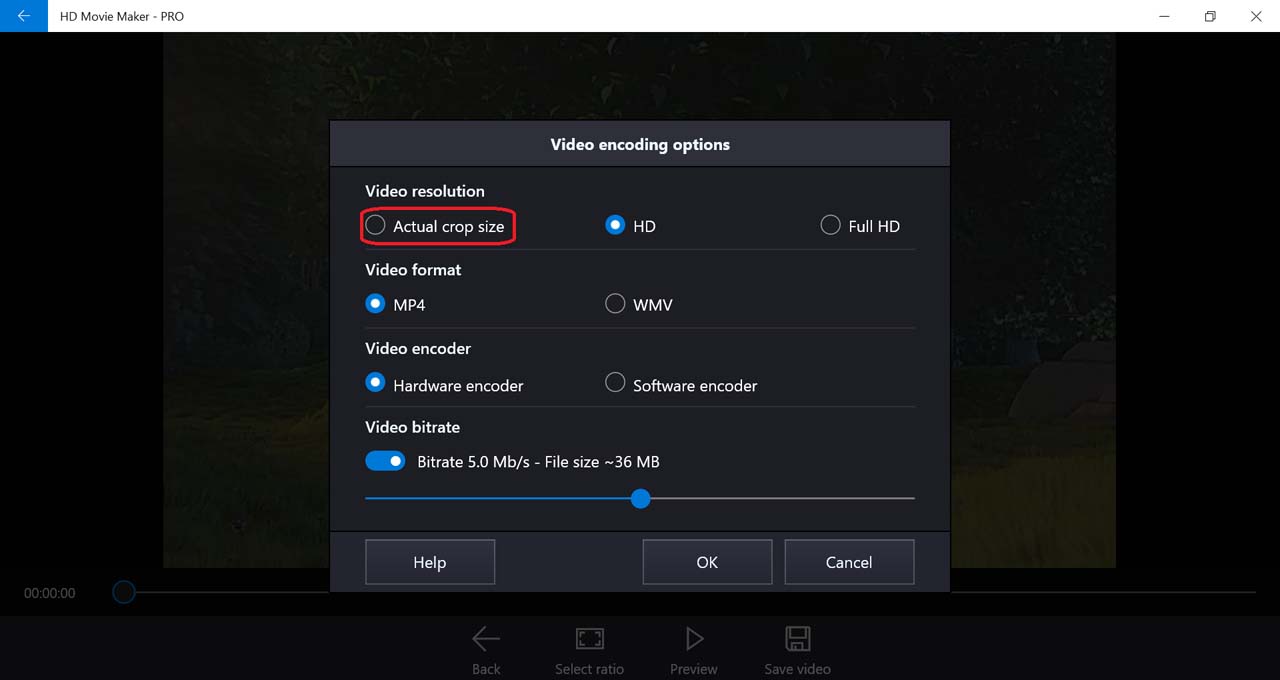
Select output movie settings, then press OK.
One thing to note is that if the ratio of the crop frame is not 16:9, when choosing Full HD resolution or HD720 resolution, black borders may appear on the sides of the video. To avoid this, choose Actual crop size while changing output movie settings.
-
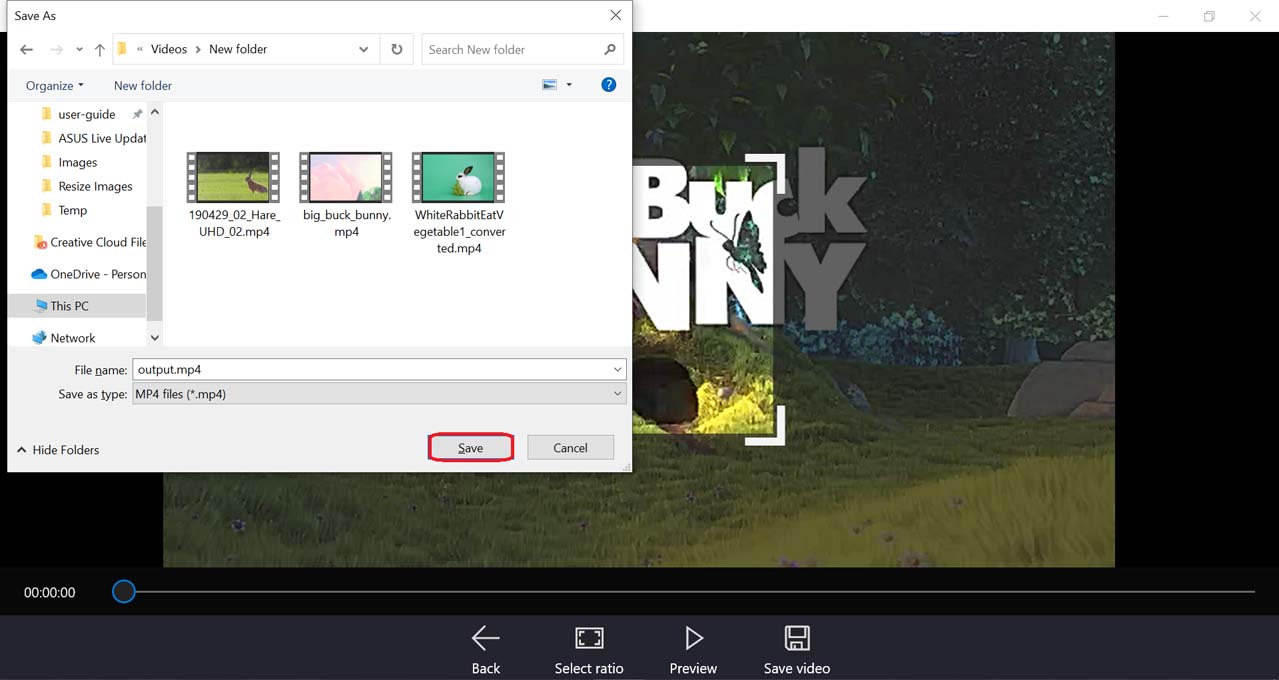
Next, choose the location to save the result as a separate video.
-
After HD Movie Maker finished processing, you can view your output video.